How to make your drip irrigation system a success
Running a flower farm has forced me to learn quite a bit about drip irrigation and watering systems, probably more than I would ever want to know. I thought I’d put together a Drip Irrigation tips post, and hopefully save some poor souls from the mistakes I have made over the years, save some beautiful plants and some money.
Prefer video? Here is our Master Gardener Presentation for Placer County: Drip Tips for Irrigation Success.
Here is my list of Drip Tips:
Do it right the first time.
We all have busy lives, and I have recognized time is our most valuable resource. If I had a dollar for every “temporary” irrigation line or drip I have put in place, well, I’d have a ton of dollars. Home Depot, Lowes, Ace, they are all villains in the game of irrigation. Easy, do-it-yourself kits, aisles with components, and irrigation gadgets are plentiful and beckon the gardener to just get it done. I would advise you to take a step back, take a deep breath, and put something in for today that will let you expand your system…in other words, do a little planning with the big picture in mind. There are some links at the end of the article to help, and great irrigation references.
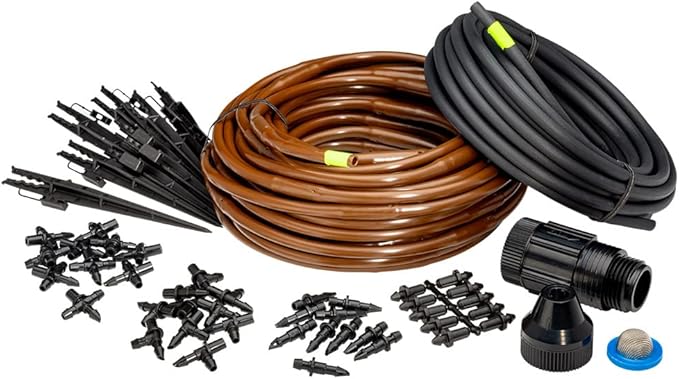
Use Quality Irrigation Components.
Quality. Quality. Quality. Irrigation components are expensive, and the upfront cost for a quality drip system can be hard on the pocket book. But take it from someone who has tried to cut corners, that cheap set of drip emitters on Amazon can bring your system to its knees, waste water and ruin your water flow plan and possibly your landscape. I recommend some of the online drip irrigation specialty retailers as a first pick, and the typical brand names you find at the home improvement stores as a second.
Know Your Water System Characteristics
Are you on city water? Well? Irrigation or ditch water? There are 3 primary water source characteristics you should know before starting:
- What is your water pressure?
- What is your irrigation flow rate?
- Does your water have particulate matter and biologics?
Knowing the characteristics of your input water system will save you time and effort, and prevent water disasters 🙂
Always Use A Pressure Regulator
Residential water pressures are typically 50-60 psi. That is way to high a pressure for a standard drip system. You may be able to set up a system that wont leak at that pressure initially, but the expansion and wear of the tubing and joints will eventually cause a blowout of your drip system, a loss of water and possibly a ruined landscape. You can purchase regulators to “down pressure” to below 30 psi, which is sufficient for most residential systems. Check your drip components as they are typically rated for flow at a certain pressure.
Note: Even if your water pressure is low enough to support a system, a pressure regulator can prevent surges and water hammer effects that can burst system tubing.
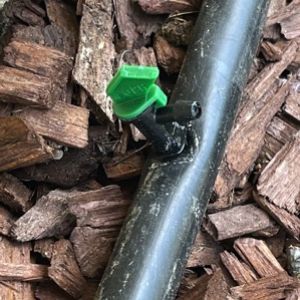
Use A Fine Mesh Filter
When you buy your drip emitter, tape, or 1/4 tubing and connectors, take a peek at the size of the openings and orifices. Over time, mineral buildup, rust, pipe erosion and other fine particles can wreak havoc on a drip system. Filters will save you headaches and tons of time, and I recommend their use even on residential water.
Add an Anti-siphon If You Are Connecting to Residential Water
Water likes to flow, and flow it will if you don’t take precautions in your irrigation system. The anti-siphon prevents the back flow of water into your house supply. Think of all that static water in your drip lines baking in the heat, sucking in some compost and then back into your house!! Tip: Make sure an anti-siphon is at least 6 inches above any emitter. It needs this differential to function properly.
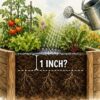
Tubing Design Rules of Thumb
Drip system design can be likened to the human circulatory system. You have the main supply lines (arteries) that expand into finer, more narrow tubing (capillaries). To insure proper flow, there are some tubing rules of thumb. You cannot run 500 feet of quarter inch tubing with 100 emitters and hope for success. So here are some general rules to follow:
- For 1/2″ Tubing: 200/200 Rule – don’t exceed 200′ or 200 gph.
- For 1/4″ Tubing: 30/30 Rule – Don’t exceed 30′ or 30 gph.
- Keep the overall length of all tubing on one zone to 400′.
Don’t Mix Emitter Types in the Same Zone
For consistent flow and performance and ease of planning, I always recommend having the same emitter type on a tubing run. If you choose flag emitters, stick with them. If you need spray emitters too, then run them on a separate line.
Use Pressure Compensating Emitters Whenever With Elevation Changes
If you have a perfectly flat garden and landscape, God love you, you are lucky. Elevation and slope changes can reduce or increase tubing pressures. To get even flow and water to your plants, if your elevation changes along a drip line, use pressure compensating drip emitters to make your system adaptable. Every foot of elevation can increase or decrease the pressure by .433 psi. For a 20 psi system, that’s a 10% reduction/increase for a 5 foot change.
It’s All About the Connection
Any connection point within your system creates a possible leak and point of failure. Make sure all your connections are secure and done properly. Here are some tips:
- Use a tool that makes clean even cuts for solid connections
- Ensure your barbed connections are fully covered
- Use pipe tape where required
- Routinely check your system for weakened connections or leaks
So that’s it in a nutshell. Here are some great links to help you on your drip irrigation planning journey:
UC Davis Drip Irrigation Resources
Rainbird Drip Irrigation Guide
Hunter Drip System Planning Guide
Shop related products: quality brass hose fittings · garden journal to plan your system · quality watering solutions

More From Our Master Gardener


Special Gifts for Gardeners
Shop Our Gardening Gift Boxes

5 Star Reviews for Our Hori Hori